Wednesday, December 12, 2012

One more...

sweet recipe before diet season begins!


These are a treat my mom and dad used to make at Christmas time, its one of those memorable tastes that stick with you for life. Guaranteed.

You will need:
Dates
Port wine, and/or other sweetish liquor
Almond paste
Chocolate - I selected Girardelli's 60% I like it dark

Find yourself some great big dried dates, the California variety are great!

Make a slit along one side, and remove the pit.

Place these open dates in a bowl, and pour on the liquor! A good port wine is great for this- and I also mixed in a little bit of whiskey. Add enough liquid to cover the dates.
Cover in plastic wrap, and put into the refrigerator. For best results leave them in there for a couple of days- at least one day.

Carefully drain the dates into a colander, and SAVE the liquid- this is for your consumption and purely delightful.

While you are getting a drink, and the dates are dripping, spread out some paper towels on flat surface.
Knead the almond paste until soft. Roll up little pieces of oval (replicate the pit) paste, and insert into the opening of the date. Carefully close it back up, and give a gentle squeeze. Put on paper towels.

Meanwhile, warm up a double boiler and melt your chocolate of choice. Place a cookie rack over waxpaper/foil next to the pot. Place the dates onto the rack, and with your spoon, pour on the chocolate. You want it to cover the top, and at least drizzle down the sides.
Put the dates in the refrigerator, and when the chocolate is hardened- indulge!

Caution- the dates do absorb quite a bit of alcohol, so consume in moderation, and don't let the kids at them!


Monday, December 10, 2012

Coming soon..


This blog is a little bit of a mix of all things I love and care about- recipes, crafts, environmental issues etc. etc. And, starting in January, I will be starting a NEW and EXCITING weight loss program. I will be featuring some new, diet friendly recipes, and more about the program starting January. And IF I am brave, I might even share my before/after/happily after after images, inch loss, successes and failures.
I'm hoping to build a team to join me, it is always easier to stick to a program when one has the support and accountability of a team.
This is a little tease, what it's all about and why I'm SO excited!

The Shaklee 180 program is going to help me and millions of others loose the weight and KEEP IT OFF.

The unique Shaklee 180 products (delish by the way) are meal replacement bars, smoothies and snacks, as well as a metabolic boost supplement, that contain Leucine™. Leucine is a patented formula that helps you maintain (and in some cases build) more muscle. This is what helps you keep the weight off.
The more muscle mass the greater metabolism!

For even greater incentive- you can earn your whole package for free! AND Shaklee will give you rewards as you loose! Amazing. 

No more yo-yo dieting- get on the program, and let me know if you want to join my team :)


Thursday, December 6, 2012

Candy Weath


I am always trying new crafts, and if they are in-expensive, even better! I saw something like this wreath at a friends house, and really wanted to replicate!

What you will need:

2 or more small helpers
1 glue-gun with plenty of glue sticks
1 bag green/white mints
1 bag red/white mints
1 foam circle
clear duct tape
Ribbon

First, ask your kind little helpers to unwrap all the mints for you, its a time consuming job, but they are easily bribed with said mints. While they are doing this- wrap tape all around  your foam circle- it will make this much more enjoyable and tidy.
Pick a starting point- this will be the top of the wreath, where you will leave a "channel" for the ribbon. Alternate mint colors per your liking, and glue and place! Easy.

When the glue is dry,wrap a ribbon through the channel you created, or over it- and glue the ribbon in place.

Done!

The kiddos decided they wanted to give it to their class room at school, so we brought it in the next day, and it is now proudly displayed- teasing children- at the kids school.

We hit the dollar store for this project, and the foam circle was $1, the candy bags were $1 each, and I already had the glue and tape at home, so it was a $3 project for me!!

Wednesday, December 5, 2012

Putting together my Christmas gift list...

 
This list has something for everyone! Give green and healthy this year. You will be surprised at the multitude of great gifts for everyone on your list. 
 

Sunday, December 2, 2012

Lussebullar


Today, in 70 degree temps, the first of Advent- I'm baking lussebullar. This is the traditional Swedish pastry we make for the Lucia celebration on December 13. It is an interesting celebration for a secular country, but none-the-less a very lovely, cute, cozy and quaint celebration that I adore. It brings some light into the harsh winter nights of December :)
I had a post for these last year, and my recipe has changed a little, as I'm always on a quest for the most moist and flavorful versions - Enjoy!

You will need:
4 oz (1 stick) butter
1 cup half-n-half
1 cup milk
2 packets active dry yeast
1 tsp salt
1 gram saffron
6 oz vanilla flavored Greek yogurt
1 cup sugar
5-6 cups flour

raisins
egg-wash (one egg, 2 tablespoons water well mixed)

Slowly melt butter in pan, adding in milk and cream. When butter is completely melted, mix in half of the sugar, and the salt. Stir well- and add the finely crushed saffron. Let the mixture stay warm until a deep yellow color has completely saturated the liquid, at that point add the yeast to the mixture.

Pour the liquid mix into a large bowl, and either with the mixers dough hook, or a wooden spoon, mix in the flour, and the rest of the sugar. Also in this process add the yogurt. Mix until you have a sticky dough.

Cover the bowl with damp towel, and let stand until at least doubled (1 hour or more). Turn on the oven to 425 degrees.

Lightly flour a surface, and place the dough on it. Kneed the whole dough until smooth and manageable, yet still slightly sticky.

Roll pieces of dough in to "snakes" about 8-10 inches long, and roll the ends opposite each other- as in picture.
Place on baking sheet.
Push raisins into "eyes" of cats, and brush them with egg wash. let them rise 5 minutes or so and pop them into oven.
It takes about 10 minutes for them to finish baking, then place them on a wire rack for cooling. And Enjoy!

Saturday, November 24, 2012

Thanksgiving..

It was great. Really great. But now I'm done with food. I know alot of us feel the same way.
My menu consisted of:
Rolls, mashed potatoes, sweet potatoes and apples with marshmallows, gravy, brussels sprouts roasted with pecans, cranberries (two kinds!), stuffing, turkey- (15 pounder), AND pumpkin pie with whipped cream.

I know its only once per year, but that is just too much food! We had two little old ladies over, me and the hubbs, and the kiddos. Truth be told, we don't really like turkey anyway. After a weekend of over-eating, and leftovers, I know its time to get serious and loose some weight.
I am not going to gain the American average of 11 lbs over this holiday season!

I am doing my research and am ready to commit to a plan. I will take my official "before" pictures, my weight, my measurements- and really get serious. The thing is that I'm not only looking for that "after" photo.. I would love an "after-after" photo. Get it? I've lost weight before on weight watchers, atkins, paleo etc. etc. but always gain it back. From the research I've done, this is explained in this way:

Almost all weight loss results in muscle loss. This means your metabolism slows down, and, when you gain back the weight, its all fat.
The program that Shaklee offers is based on Leucine. A patented protein that actually helps you maintain muscle mass during weight loss. A couple of reasons to choose Shaklee; always safe, always 100% guaranteed, no artificial anything, non GMO soy, and amazing results in the clinical trials.
Oh, and the products are SO GOOD! Currently their weight-loss program is called Cinch, but starting January 1, 2013, it will be called Shaklee 180. 90 days to loose the weight, 90 days to learn to keep it off. 180.


I can't wait to get a team together and get started!

Saturday, November 17, 2012

Christmas Almonds- made in the Crock Pot!

I know, its only November, but I had to TRY the recipe before I make to for others, right?!
I mixed up a few recipes I've run across before, and came up with this devilishly tasty almond treat.

You will need:

3 cups raw almonds
1 1/2 cup brown sugar (light or dark!)
1 cup white sugar
2 teaspoons salt (sea salt is preferred if you have!)
2 tablespoons cinnamon
1/4 teaspoon ground cloves
1/2 teaspoon cardamum
1/4 teaspoon nutmeg

1 egg white
2 teaspoons vanilla extract
1 tablespoon water

1/4 cup of water, or apple juice

Coconut oil

Powdered sugar

In a large bowl, mix up sugar and spice and everything nice. No, just kidding. Not the nice part.

In another bowl mix the egg white and the vanilla extract, and the 1 tablespoon water, until blended well.
Add the almonds to the egg white mix, and make sure they all get coated. Then combine with the sugar mixture.
Mix well, ensuring all almonds are well coated in sugar mixture.

Grease the crock pot bottom and walls with coconut oil, and put crock on low heat. Add the almond mixture, put the lid on.
If you can, try to come back and give it a stir ever so often. Let it cook about 3-4 hours on low, lid on.
At this point it should get really hot, and starting to melt the sugar slightly- add the liquid (water or apple juice). It should hiss and sputter a little bit- stir well!

Cook with lid on for another 30 minutes or so, stirring frequently! When it thickens alot, take them out with a spoon and spread over parchment paper. Once the cool off enough to touch- get in there with your fingers and separate them completely, and place them in a bowl. Before they completely cool, sift some powdered sugar over them, and mix well- coating all the little golden brown nuggets of goodness with a coating of "snow". Let dry completely (if they make it that long), put in a pretty jar- and gift to someone you really love.

Thursday, November 1, 2012

Healthy Halloween

Oxymoron, right? I was assigned the task of bringing healthy snacks fro the kids school's Halloween party. Samples listed were, cheese, crackers, fruit, vegg etc.
Doesn't sound like alot of fun, so I put my thinking cap on and came up with the following:

Clementine Pumpkins
And, the one that required a Costco trip; Cantaloupe Pumpkins.
Found a great pumpkin cookie cutter, at ACE hardware of all places!! Next, I went to get the melons- and to get enough flat, cuttable surface, I needed quite a bit. Luckily Costco had the Tuscan Cantaloupe in store, and they are about twice the size of regular ones- hooray!
I still used 3 of these giants..
The first step was to really, really clean the melons on the outside. With all the listeria outbreaks related to melons lately, I take no chances. So, I filled the sink with warm water (not hot! don't want to cook the melons!). I added 1 tsp of Shaklee's Basic G, and a few drops of Basic H. The G is a germicide, and the H will clean any surface! I rolled the melons around in the solution and scrubbed them with my dish brush. The rinsed with cold water. I also made sure the knife, and cutting board were equally clean. I peeled the pumpkins with my filet knife, and voila!

Thursday, October 18, 2012

Another Fall Fave

My hubby requests these bad boys every fall. Especially once the kids and I have brought home the pumpkins from the farm. Thank you Miller Farm- what an amazing place to be. Way more than pumpkins, this farm also offers huge selection of seasonal vegetables, and they are a very popular CSA around here.
So, we brought home the pumpkins on Monday, carved them yesterday (and of course saved the seeds). Today My dear husband came home "did you roast the seeds yet!?" He gets childishly excited about these, so whom am I to dissapoint!

The hardest part of roasting pumpkin seeds, is the separation of the seeds from everything else. I put the kids to work scooping out the pumpkins yesterday. I put all the pumpkin innards in a large bowl and filled with water. The seeds float to the top, and it makes the process alittle easier.
Once you have all the seeds separated, dry them off with paper towels. They will still feel "slimy" after they've been dried, but remove as much of that as possible.
Turn on the oven to 350 degrees.
The rest is depending on taste. I've done these with olive oil and sea salt, I've done them with a touch of salt, brown sugar and cinnamon too.. This is my hubby's favorite:
Melt butter (about 1/2 stick), mix in the seeds. Add salt to taste.
Spread evenly over cookie sheet, pop in the oven, and stir every 5 minutes until crispy and golden brown. Devour.


Monday, September 24, 2012

My Fave Season is here- and apple butter

I am in love with this season. Fall. Or Autumn (sounds prettier). The kids and I went to a friends house this weekend and picked 60+ pounds of apples. I have been making apple sauce and apple butter and pie. And more is to come. I haven't skimmed the surface of the apple mountain.
So in Pinterest I saw all these recipes for apple butter, and to my great joy, crock pot recipes! But, because the best apple butter I ever had was made by an Amish woman, I decided to try to find an authentic recipe. I ended up with a combo, and it is SO good.

I peeled, cored, and chopped 12 large apples. Pop in the crock pot with 1/2 cup water, 1/2 cup brown sugar, 1/4 cup apple cider vinegar.
This next step is really depending on taste, I taste test until I'm pleased with the mix;
1 tsp salt
1/2 tsp ground cloves
1/2 tsp cardamom
1/2 tsp nutmeg
1 Tbsp Cinnamon

Cook in crock pot on low for 8 hours, stir once per hour to make sure nothing gets stuck to the sides. If you do it over night, you could skip that step, and hope for the best ;)
After 8 hours turn it up to high. Cook until apple is super tender and liquid is thickening. Then either use your hand held blender, or transfer into one, and blitz until smooth. A few lumps and chunks are totally acceptable!
Proper sterile canning is the preferred method of preservation, but you can also freeze. Or you can just put it in the fridge and eat it.
Whip up some biscuits and enjoy this first taste of fall!

Friday, August 31, 2012

Fried Green Tomatoes

There was little to no drama in the making of these fried green tomatoes. But there was much munching and begging for more upon the completion of the saga.

Although the South is probably my favorite place to be, I have never actually tried these divine little creations made famous by a certain dramatic movie. The only reason I decided to make them is that I have, literally, hundreds of large green tomatoes in the yard. After asking for expert advice (thanks B), I learned I needed to harvest some greens to get the pants ripening.
So, the kids and I set out to find 6 of the largest green tomatoes. Results were more like 8-10.. the kids thoroughly enjoyed this task.

I sliced them about 1/3" thick, placed them on paper towels, and salted lightly. I let them sit there while I put the rest of the fixins' together. In order:
  • white flour mixed with salt & pepper
  • egg/buttermilk mix (2 eggs & about 1/2 cup buttermilk) salt & pepper
  • Panko breadcrumbs mixed with cajun seasoning (Shout-Out for Panko- LOVE these crumbs!)
 I also heated up my old faithful cast iron pan, with about 1/2" of canola oil, really hot.
 Then, in usual breading fashion, dredge the tomatoes in flour, then into egg mix, then coat in bread crumbs. Pop into the oil and watch them sizzle. Turn them over after about 1 minute, and once both sides are beautifully browned, remove and place on paper towels.

Make an aioli or remoulade sauce, or something similar, dip and go!!

I made a sauce out of a little buttermilk, mayo, cajun seasoning, lemon juice and ketchup. Very good and easy! Enjoy!

Friday, August 24, 2012

Another thrilling topic- laundry

But it must be done- when you find something that rocks your mile-high piles of laundry, you simply must share, right!?
Coming back from camping- even if its just a one night trip, is laundry nightmare, or used to be. After our most recent trip I had the regular big bag of camp smoke infused fleeces and soggy socks, and as an extra bonus, a whole set of puked on toddler clothes, said toddlers pee accident pants, and other toddlers hot cocoa soaked PJ's. Yes, these are stains to challenge event me most seasoned house keeper.

In my previous life (pre-Shaklee), I would have, no doubt, ruined something with bleach stains, or, used something even worse- Oxi Clean.. have you ever gotten that stuff on your wet hands??? It burns like crazy!

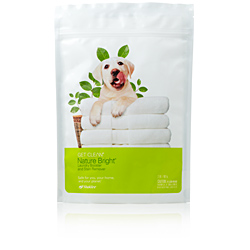
So in my current, more sane, Shakleeized life I took the calm approach of pre-treat with strong Basic H, put a tiny little scoop of Nature Bright in the drum, popped the nastiest laundry in there.. .added my detergent and softener, and bam- CLEAN.  No stress, no burns, no worries. It works every time. It is safe for me, my family and the planet, and these are the best laundry products I've ever tried.

There, exciting laundry post complete.

Saturday, August 11, 2012

A recipe, its been too long!

For the past month or so, I have in support of my hubby, tried low carbing my diet. The best part about starting a low carb diet, is to get over sugar addiction. What a difference! I was literally the biggest carb addict you'd ever meet. Sweets, breads, pasta, candy, you name it, I LOVED it. I never thought I could stop eating all that, but, I did. And it was not that hard. The first week I had mad cravings for random carbs, but I struggled through them with iced lattes made with whipping cream (yes they are as good as they sound). Nuts and cheese became the new snack of choice. Also lots of celery and lettuce. Romaine lettuce leaves with cream cheese- yum!
I've learned a few new tricks and recipes along the way, and since this is now the whole families favorite breakfast, I thought this would make for a good share!

Cream Cheese Pancakes (easiest pancakes you've ever made!)

2 eggs
2 oz cream cheese
pinch of stevia sweetener
pinch of cinnamon
a few drops vanilla.

Mix in blender (used my bullet type blender- pour right into pan from blender!)
fry in a little butter.
Serve with sugar free maple syrup, a little more butter, and my personal fave- LEMON JUICE.
Divine.

Enjoy!

Thursday, August 2, 2012

Disinfectant- what an exciting topic... none the less..

It is incredibly important to research all chemicals you use in your home. Everything you use can impact your health and that of your family. Not to mention what it does to the planet!

Today I am going to run down some facts about disinfectants.  I will compare Shaklee's Basic G with Bleach. These numbers are easy to find, I have googled the answers and they are all there for the taking.

Shaklee's Basic G (Germicide) is a powerful cleaning agent with strong anti microbial qualities. Use only as directed, but DO use it.

Both Basic G and Bleach (most brands) are EPA Registered Disinfectants.
Basic G has a residual effectiveness of up to 3 days (in lab conditions using E.Coli on linoleum tile). Bleach, no more than one hour.
Basic G's shelf life is over 3 years. Bleach, up to one year.
1 Quart of Basic G makes 64 gallons of disinfectant cleaner. Bleach- 1 Quart makes 7.5 gallons.
Basic G has no corrosive properties, Bleach may corrode stainless steel and aluminum.
Basic G has a fresh and clean scent, Bleach gives off pungent, noxious fumes.

Basically Basic G out-performs Bleach all around. Except for the bleaching part. For that, you need Nature Bright!

Please share, and lets try to minimize the use of bleach. It will not just permanently stain your clothes/linens, it is also a toxic mess, dangerous for you, your family and your pets.

Wednesday, August 1, 2012

My Vegetable Garden

Living in a city has its drawbacks, I can't have the acreage of vegetables and pumpkins I dream of. But, I can have a small vegetable garden! This is my fourth year of being a back yard "farmer", and we all love it so. The kids and I plant the seeds in spring, and transfer the seedlings into the little fenced plot in the back yard (we have dogs, hence the fence).
We all love to harvest, and we are finally at a point this year where we can harvest something almost daily. We have at least one zucchini each day, tomatoes (4 varieties) are starting to ripen, jalapenos are ready as are the green beans. The strawberries never actually make it inside, since they are the responsibility of the toddlers.. 
We have tons of herbs that I use in cooking each day. We have tons of basil, rosemary, oregano, parsley, chives and even fennel. I can't wait to harvest the fennel bulbs this fall!

Now, all that said, I have had one little problem this year. Aphids. They showed up when the cabbages started forming. I started asking around with gardening friends and family, and got lots of great advice. I will not use any kind of chemicals or pesticides, ever. Well, of course, Shaklee came to the rescue again! I was surprised to hear that lots of people use Basic H in gardening! It is used as a deterrent for all kids of bugs, including aphids! And, lots of people use their waste water from cleaning the house(with Basic H) and pour it over the plants to enhance growth and greenery!
So, I tried it. I sprayed a strong dilution Basic H (50/50 water) all over the cabbages. The very next day the aphids were gone! I have since sprayed it on them about once every other day. No more aphids!! The cabbages look great!

Friday, July 27, 2012

Ever think about supplements?

Most over the counter vitamins and supplements do not dissolve in your body. So why pay for them?
If you are interested in your health, and have thought about supplements, you may want to check out this short video.
If you do have any questions about this video or would like to try some of Shaklee's famous supplements, contact me. There is a nice convenient form in the right hand bar of this site.

Educate yourself when it comes to what you are putting in your body, and in the bodies of your loved ones.

Wednesday, July 11, 2012

Super Inspirational!

As a mom trying to make a living working out of the house, this following video clip is so incredibly inspiring. I am lucky to be partnering with the same company as Miranda, and feel strongly about sharing this with anyone else interested in making a difference in their lives.
When you partner with Shaklee you not only work to improve the health and well being of your family, but of the whole planet! And, the most amazing part of it all- you can make a great income doing it as well!
Check out this 8 minute video, and share with anyone you feel might benefit!

Sunday, July 1, 2012

Think

Just have to share this image. It speaks louder than any words.